
Setup and Launch Your Facebook Ad
Follow These Steps to Setup Your Facebook Ads
Overview
The following steps are necessary to get your Facebook Ad integrated with HighLevel. You can choose from our proven ad library, customize the templates to give them your own imagery, and run as many ads as you like!
Please watch the Ads Overview video and follow the steps below to complete setup.
Facebook Ads
The Facebook Ads section allows you to launch an ad from our proven ad library in HighLevel.
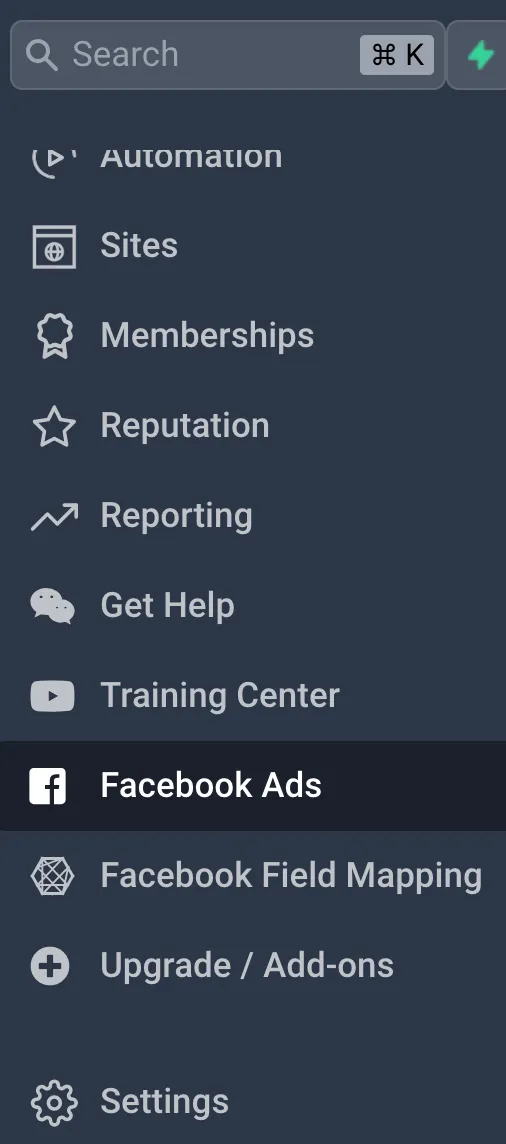
To get to the Facebook Ads tab:
Log into your HighLevel account
On the lefthand menu, click on "Facebook Ads"
NOTE: Please make sure your Facebook account is integrated with HighLevel BEFORE attempting to launch your ads. For instructions on how to integrate your Facebook account, click HERE.
Choose a template category
Click "Launch new campaign" in the upper right hand corner to navigate to our ads library. We have divided up our proven ads into subsections based on services offered, for instance: the "MedSpa" category contains proven ads we've built centered around Botox, laser hair removal, etc.
Select a category.
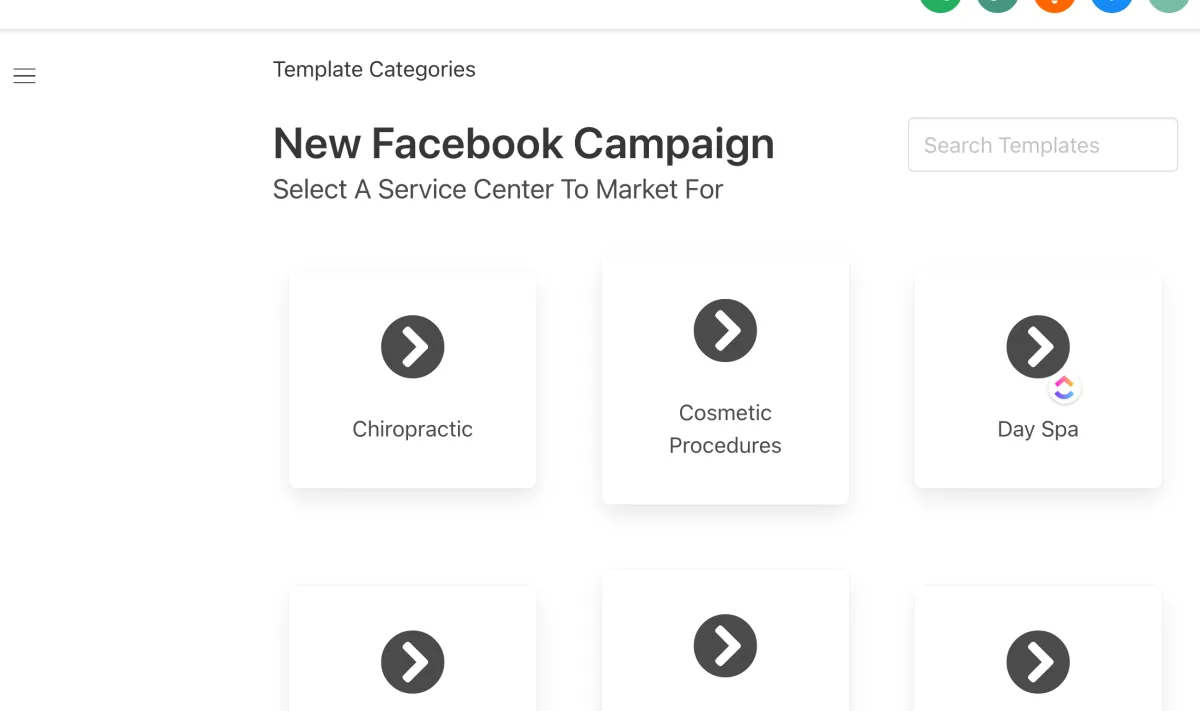
Select an ad template
Once you've chosen a category, navigate through the templates to find an ad that works best for you. If you do NOT see an ad that works for what you need, thats OK- you can choose from any of the ads and edit it to fit your needs by following the instructions below:
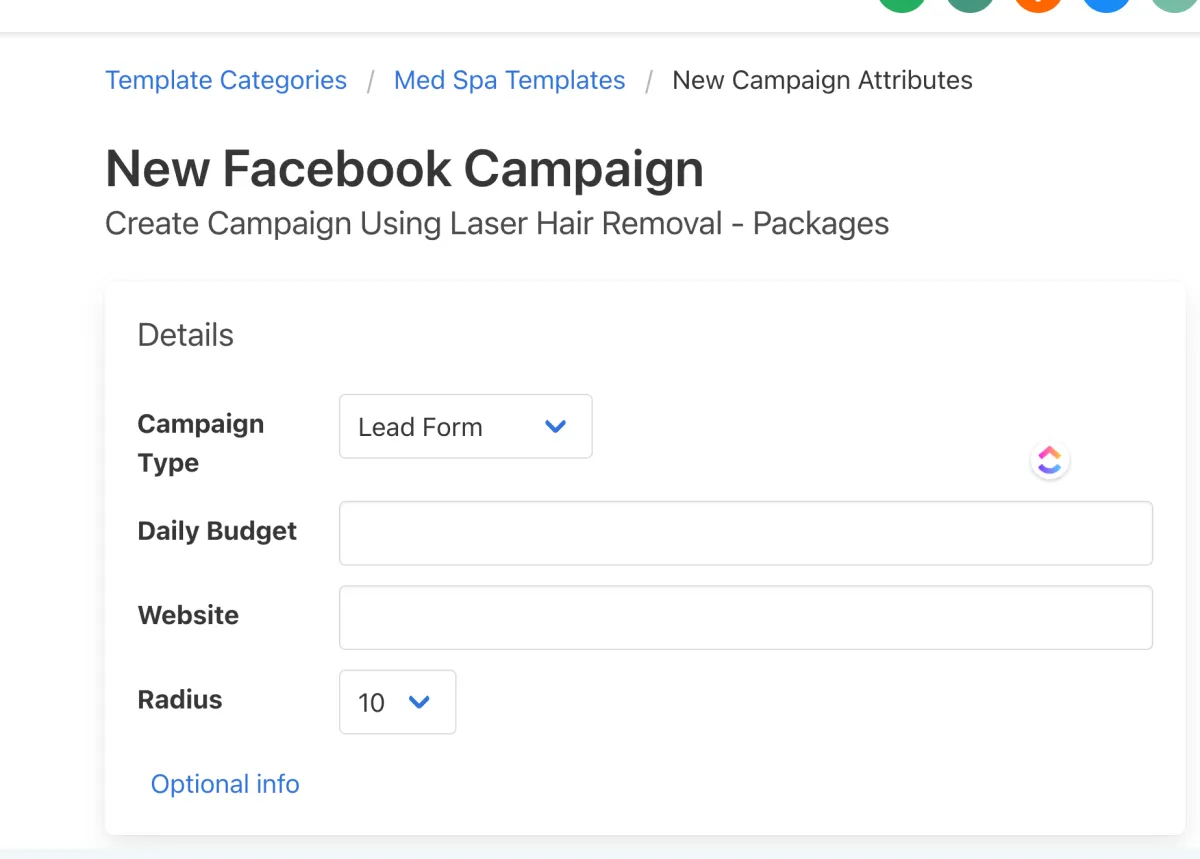
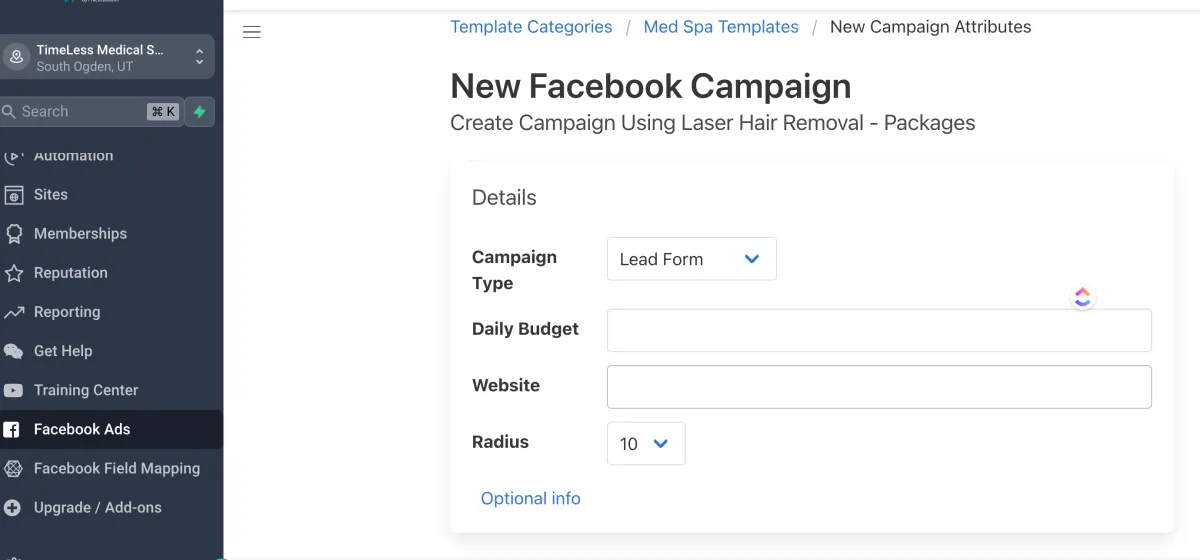
Select an ad, you will then be taken to this page (see photo on the left).
From here, follow these instructions:
1.) Leave "Campaign Type" unchanged
2.) Enter your budget for your Facebook ad spend under "Daily Budget" (pro tip: we recommend anywhere from $30-50/day for successful, far-reaching ad campaigns)
3.) Under "Website" enter your practice's website link
4.) Under "Radius" enter how far you would like the ad to target in miles (pro tip: we recommend anywhere from 20-30 miles for metropolitan areas)
Edit ad template
Again, if the ad you've selected doesn't 100% your needs, you can now edit the ad with these instructions. Remember, these are proven ad campaigns that we've run with over 1000+ medspa clients that work, so please try keep the ad wording the same:
1.) Click "Optional Info" to expand the section needed to customize your ad. A list of categories to customize your ad will now appear below Optional Info. You will only focus on the following: Location Targeting, Ad Media, and Ad Text.
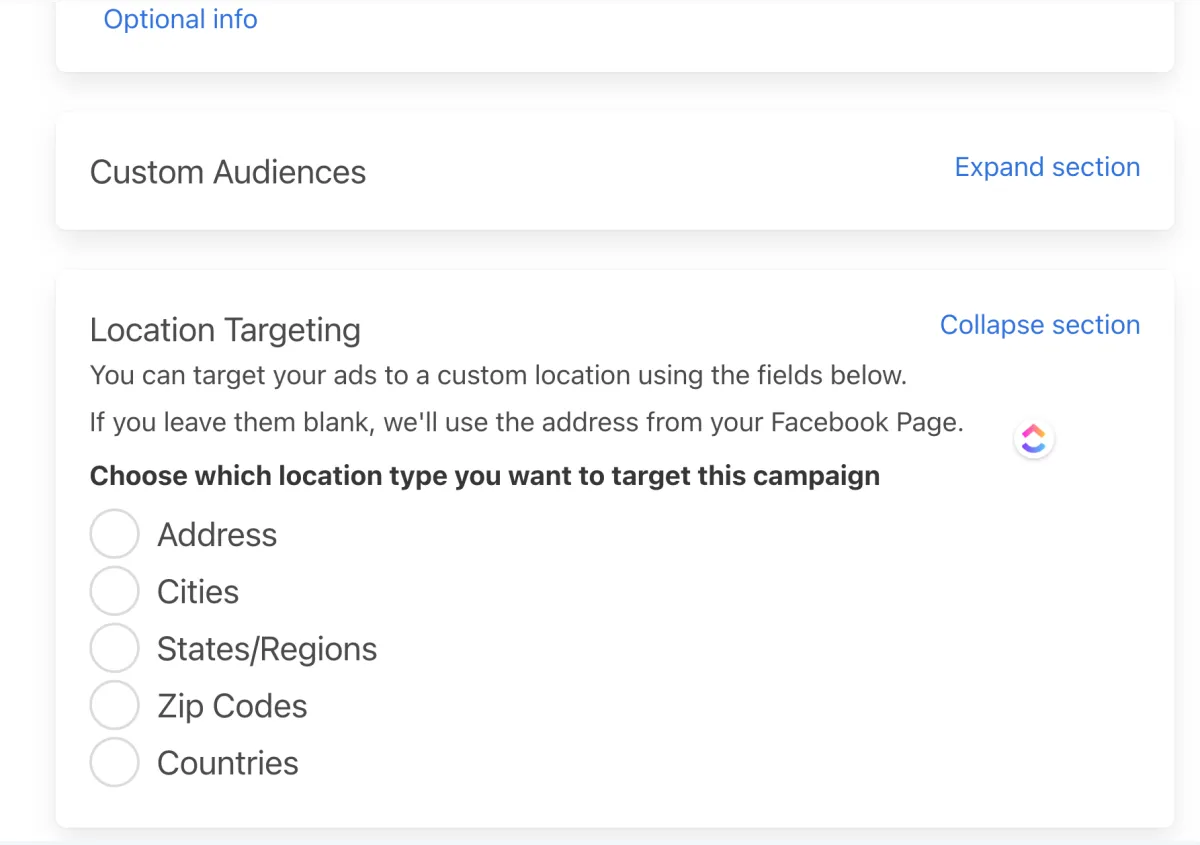
Edit Location Targeting
From here, you can edit where your ad will reach. If you leave this section blank, the ad will use the address from your Business's Facebook page. (Pro tip: if your practice is in a lower income area, we suggest editing where your ad targets using the instructions below):
1.) Click "Expand Section" to edit location
Choose "Cities" to add in suburbs and towns you would like to target. EX: If you're located in NYC and want to target more affluent neighborhoods, type in East Village, Gramercy Park, etc.
OR
Choose "Zip Codes" to target a list of zip codes. (Pro tip: we recommend choosing this option and searching Google for the zip codes in your area that have a yearly income of $80,000+)
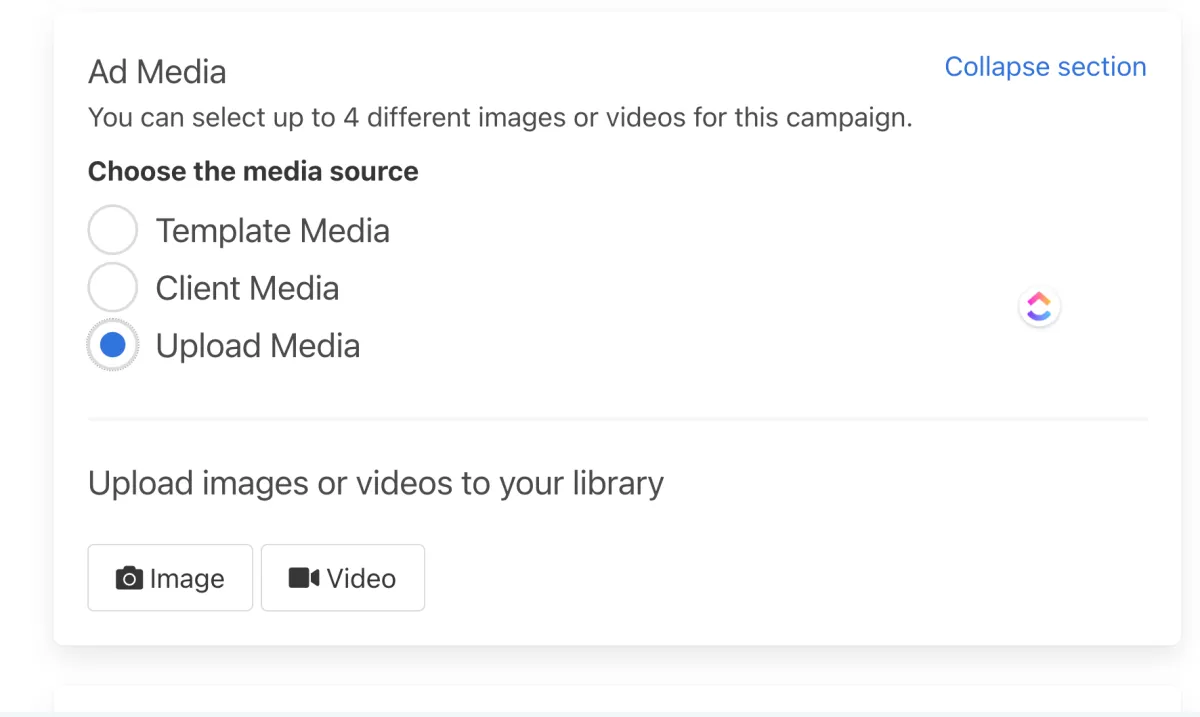
Customize Ad Image
You can utilize the ad imagery we have created and know works, or you can upload your own imagery from this section.
1.) Select "Expand Section" under "Ad Media"
2.) Select "Template Media" to use the imagery that our agency has created
OR
3.) Select "Upload Media" to upload your own image or video. (Pro tip: utilize Canva.com as a free resource to create unique ad images for your practice)
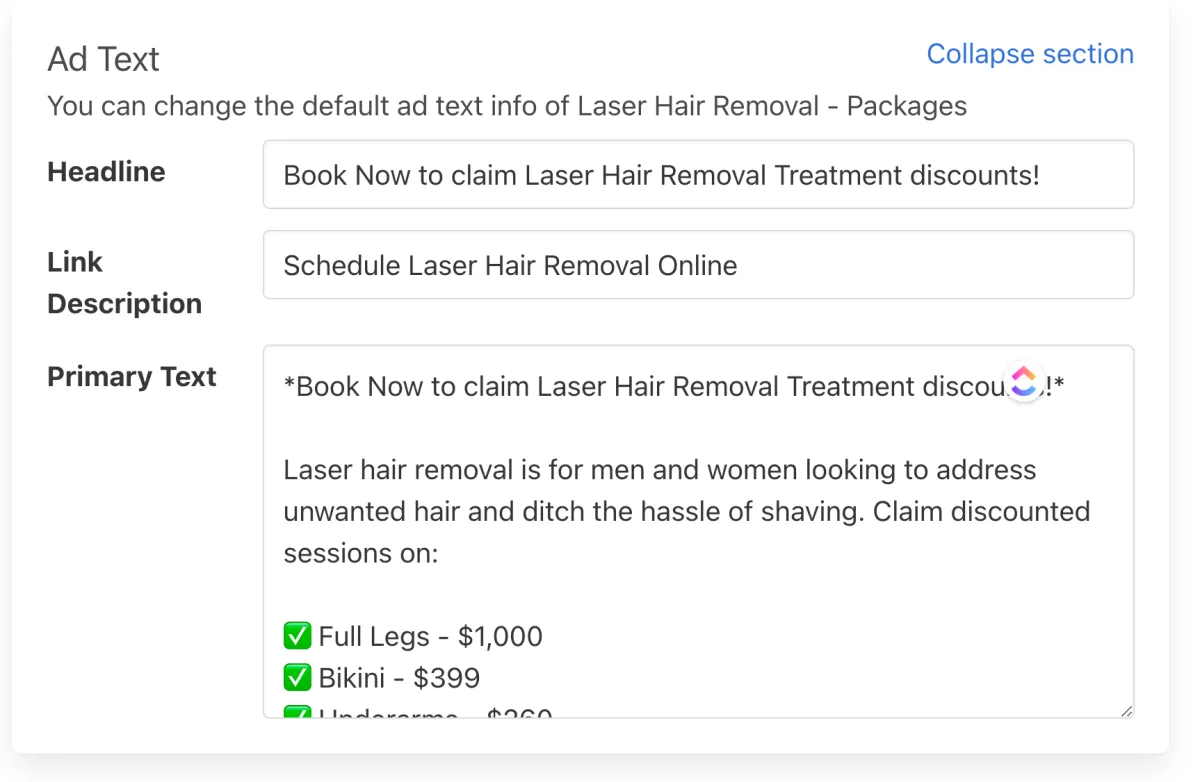
Customize Ad Text
The ad text included is what we call "ad copy" and this ad copy we've written has been proven to work with over 1000+ clients of ours. You can add in your own details into this ad copy; however, we don't recommend making too many changes as we know this wording works to target leads.
1.) Select "Expand Section" under "Ad Text"
2.) Edit the "Headline" to change the eye-catching title. (Pro tip: this will be the first piece of the ad your audience will see, we recommend keeping it short and only 1 sentence. Have a strong call-to-action)
3.) Edit the "Link Description" to edit the button that your leads will click on when claiming the offer. (Pro tip: keep this short also! 2-5 words max.)
4.) Edit "Primary Text" to change the ad copy and customize what your offer is for your clinic. (Pro tip: this is ad copy that we know works, only edit small pieces that are pertinent to your practice).
Launch Campaign
Once you have chosen the ad you like and customized the location, media, and text to your practice, you are ready to launch the campaign! Launching the campaign is NOT the final step. Follow the instructions carefully below:
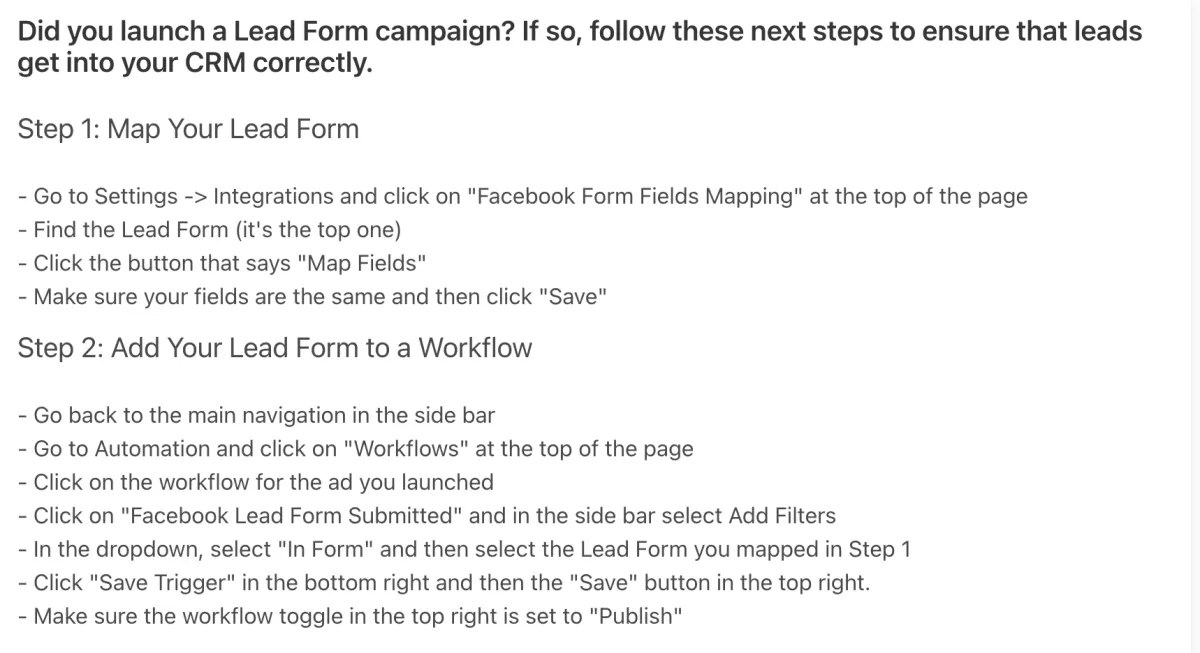
1.) Click "Launch Campaign" to launch the ad to Facebook. Once the ad is successfully launched you will see the following instructions pop up (see photo on the right). Follow these instructions to make sure that your leads that click on the ad on Facebook will be uploaded into HighLevel. This is the most crucial step! Not following this step will prevent all of your leads from being uploaded into HighLevel and make it impossible for you to follow up with and book them into new patients.
Connect Lead Form to HighLevel
Once you have chosen the ad you like and customized the location, media, and text to your practice, you are ready to launch the campaign!
Launching the campaign is NOT the final step. Follow the instructions carefully below:
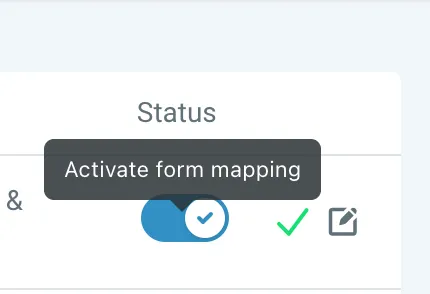
Navigate to the menu on the lefthand side and scroll to "Facebook Field Mapping"
From "Facebook Field Mapping" toggle the "Status" bar to ON (blue). (Turning the status to ON will make it so that whenever a lead clicks on your ad and fills out their information, their information will be imported into HighLevel)


Connecting Your Ad to HighLevel
Once you have toggled the status to ON within the Facebook Field Mapping section, you can now turn on automated responses that will go out to your leads following the instructions below. This step is important because data shows that you have an 80% chance of booking a lead as a new patient if the lead is followed up with within the first 5 minutes.
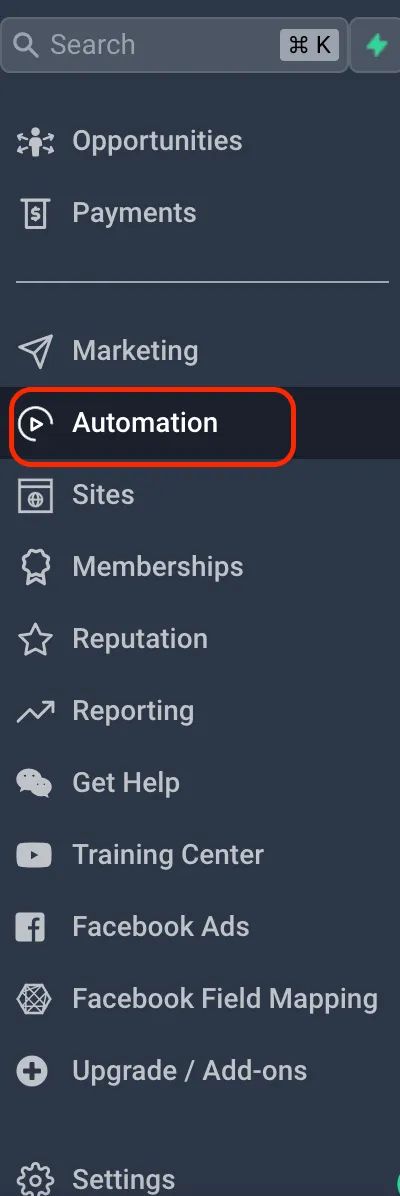
1.) Navigate to the menu on the lefthand side and click "Automation"
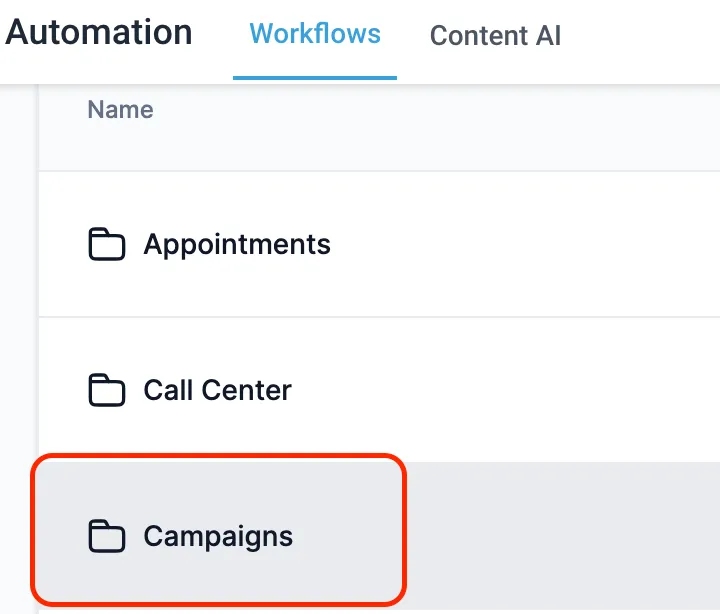
2.) Click on the folder titled "Campaigns"
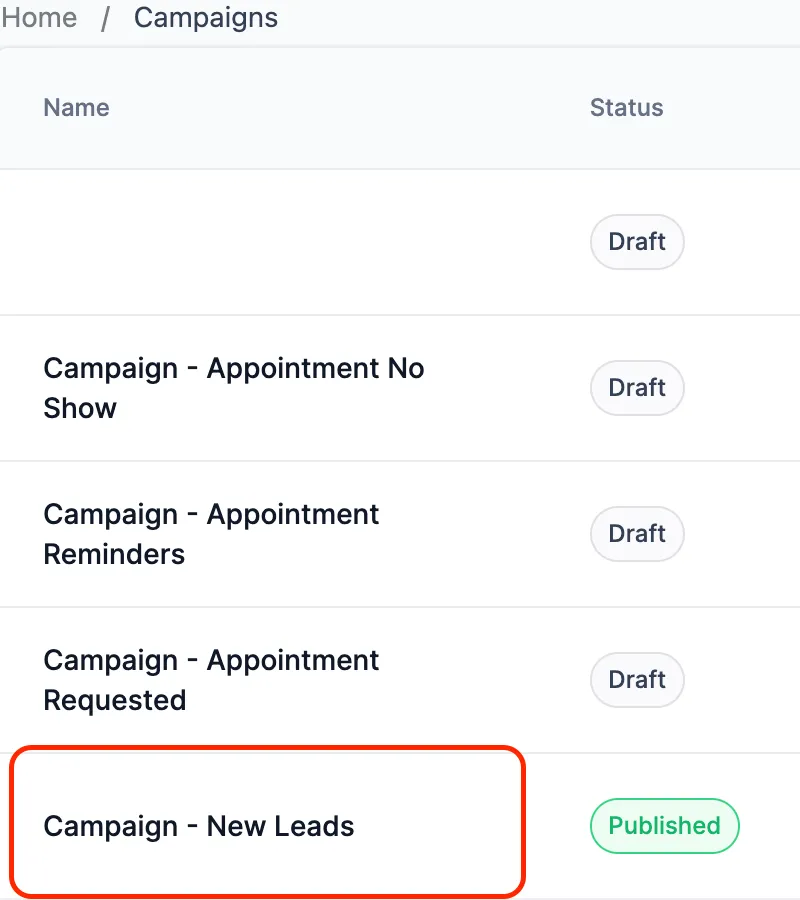
3.) Click on the folder titled "Campaign - New Leads"
4.) Click on the box "Add New Workflow Trigger"
5.) Under "Choose A Workflow Trigger" select "Facebook lead form submitted"
6.) Under "Filters" choose "In Form" and to the right of in form, select from the ads you've published (see photos on the right for example)
7.) Click "Save Trigger" in the lower righthand corner
8.) In the upper righthand corner, toggle bar from "draft" to "Publish" and hit "Save" to launch the automated responses to your leads.

© 2024 MedspaBloom LLC - All Rights Reserved