
Calendars
Learn All About the Calendars Section
What Is It?
The Calendar system can be used for managing your schedule and also allowing online booking for customers.
Watch the video to see an overview of the Calendar system and view details about the individual features within the system by reading through the descriptions below.
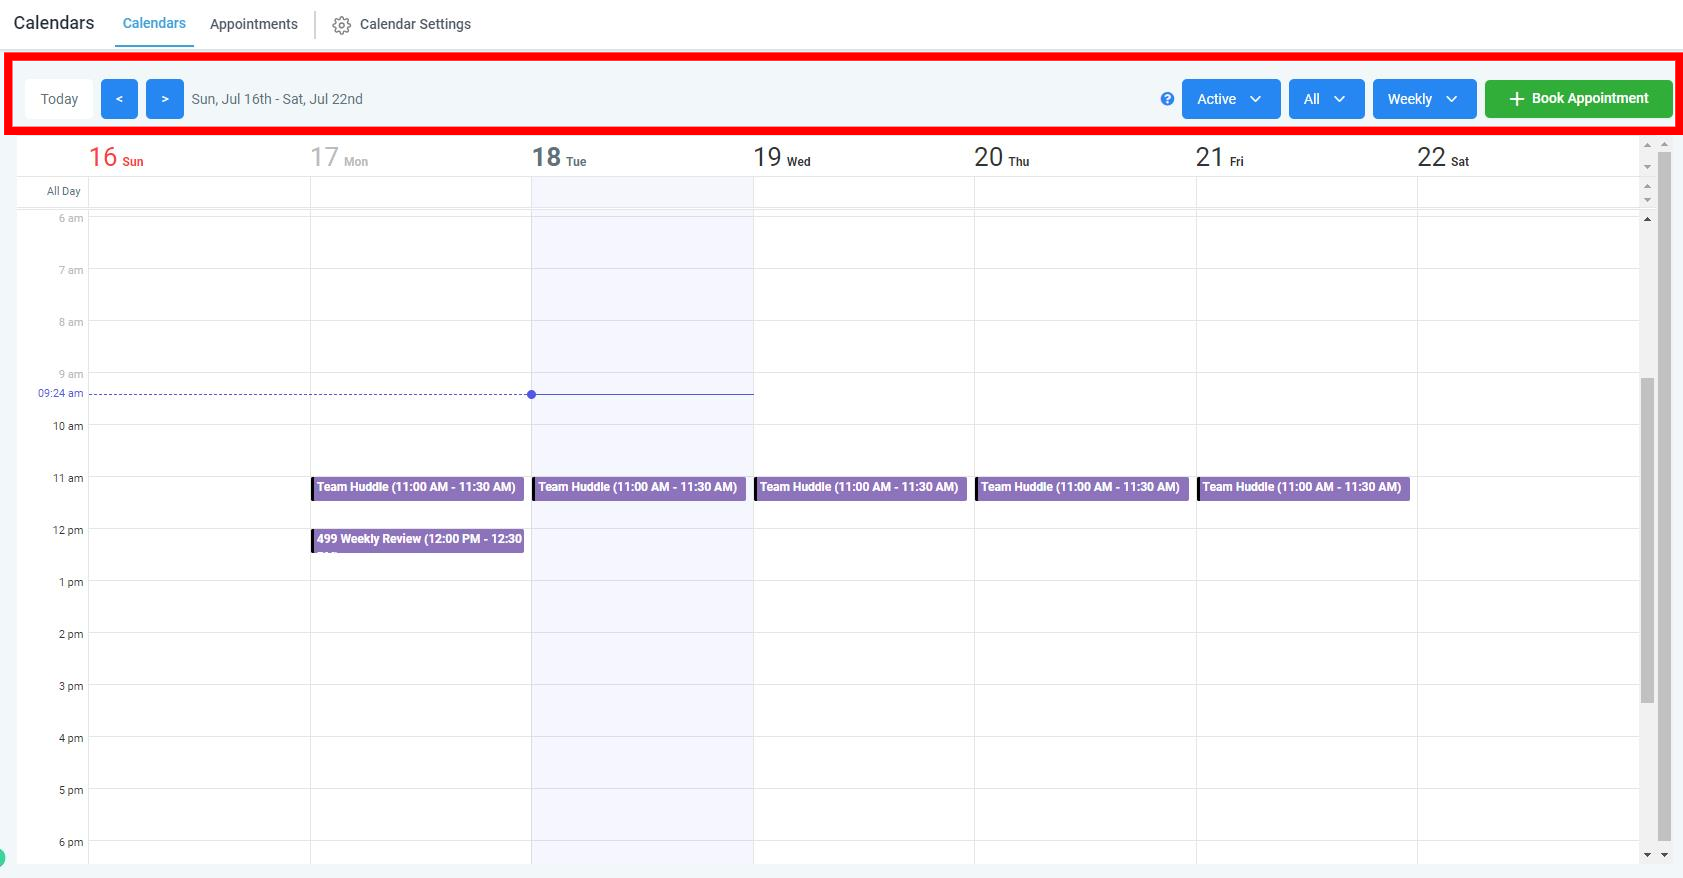
Calendar View
This is the main view you see when you click on "Calendars" on the left side navigation bar. In the upper section of the page (on desktop computers), you will have several options for interacting with the calendar.
Select Dates: In the upper left, you can choose the dates to view.
Select Calendar: If you have more than one Calendar, click the first dropdown box in the upper right to view a list of all Calendars and select which one to view.
Appointment Types: The 2nd dropdown box in the upper right is for filtering the view based on Appointments or Blocked time slots or view All.
View Type: The 3rd dropdown box in the upper right is for changing the View Type to Day, Week, or Month.
Book Appointment: If you want to manually add an appointment to the calendar, you can click the green "Book Appointment" button.
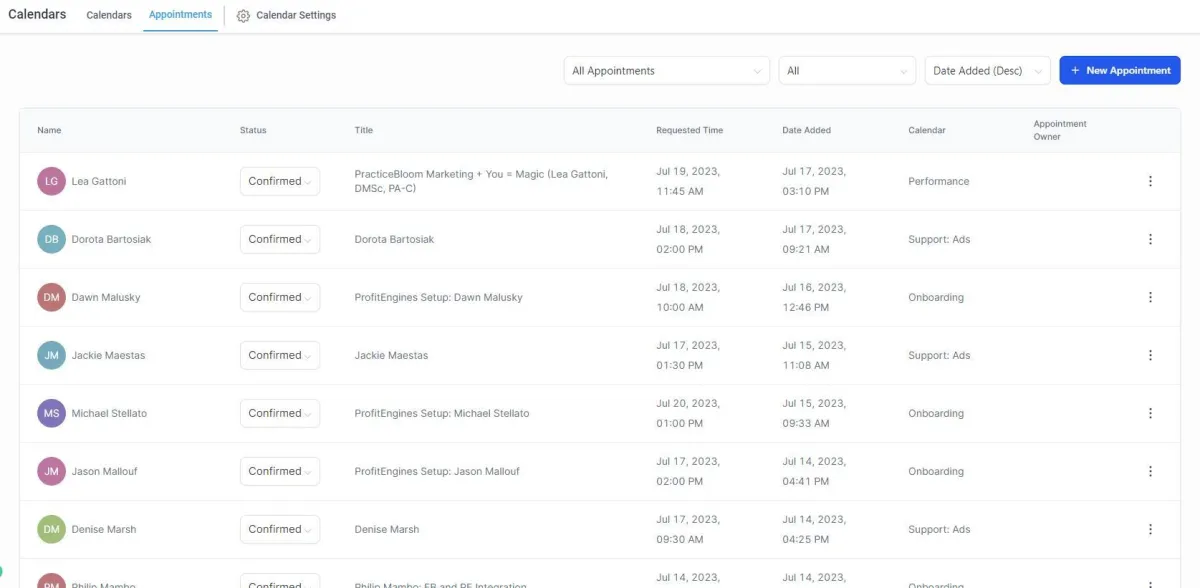
Calendar: Appointments
On the Calendar page, at the top, you can click on 'Appointments' to see a list view of all Appointments (vs the default Day/Week/Month view).
Name: Name of the contact for the Appointment.
Status: The status will show you if the Appointment is Confirmed, Showed, No Show, Cancelled, Invalid. You can use these status designations to trigger automations if desired (ex: once set to No Show then an automation will run sending a text message and email with a link to re-book).
Title: The Title is the name of the Appointment on the Calendar.
Requested Time: The Requested Time is the date/time the contact scheduled or requested.
Date Added: The Date Added is the date and time the Contact scheduled or requested the Appointment.
Calendar: The Calendar is the Calendar that the Contact scheduled or requested the Appointment on. If you have multiple Calendars, this is helpful to see which Calendar the Contact booked on.
Appointment Owner: The Appointment Owner is generally assigned if an Appointment is manually created.
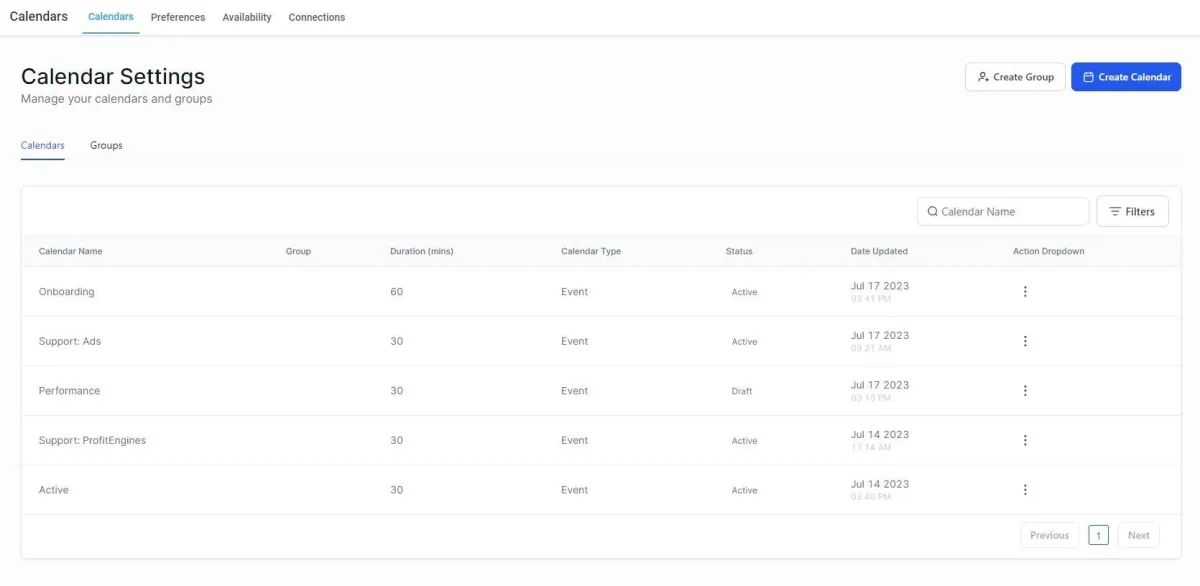
Calendar: Settings
When you click on Calendar Settings at the top of the page, it will take you to the Settings section of HighLevel. The Settings section is where you can Add, Edit, Delete Calendars.
On this default view, you will see a list of all the Calendars setup within your HighLevel account.
Add Calendar: You can add a new Calendar by clicking the 'Create Calendar' button in the upper right (on desktop computer).
Edit Calendar: You can edit an existing Calendar by clicking the vertical 3 dots to the right of each Calendar listed and selecting Edit.
Delete Calendar: You can delete an existing Calendar by clicking the vertical 3 dots to the right of each Calendar and selecting Delete.
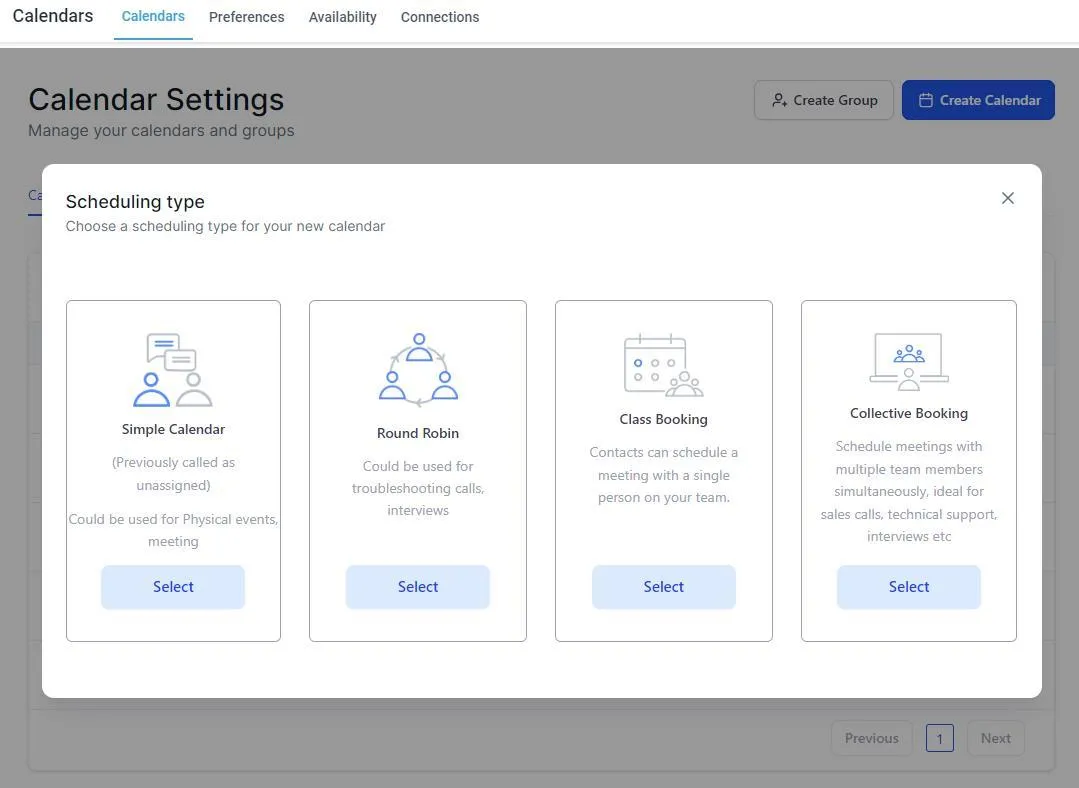
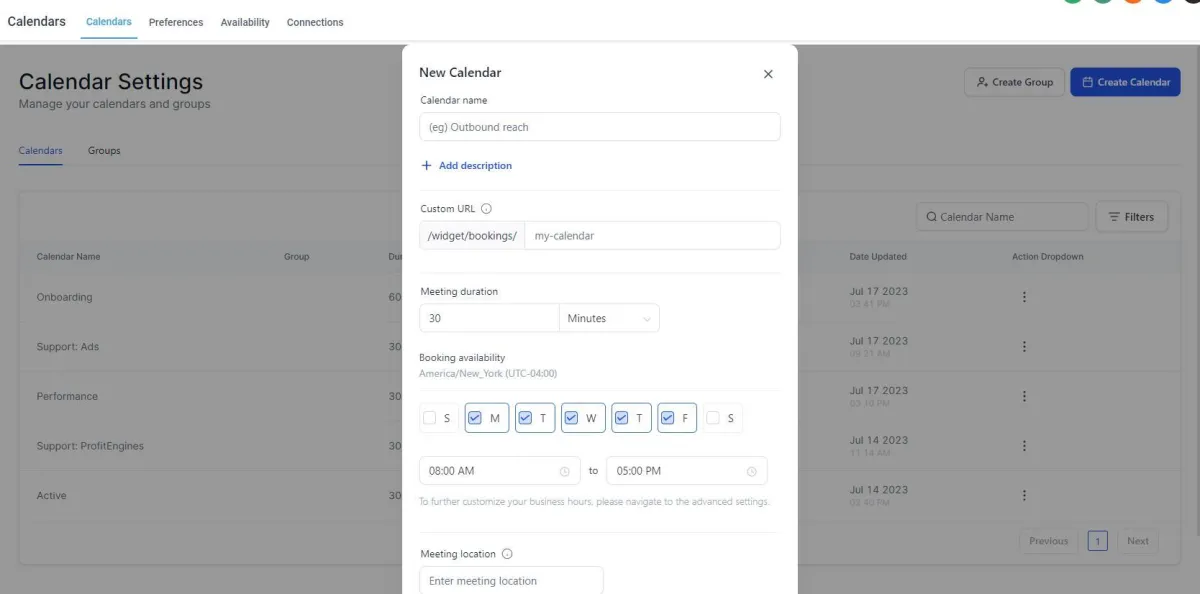
Create Calendar
In the upper right, click on the 'Create Calendar' button.
Scheduling Type: Generally, you will select the 'Simple Calendar' if you want a Calendar for a single person, location, or service. Select one of the other calendar types if it is better suited for your needs.
Follow the prompts and form fields to setup the new Calendar as desired.
Calendar Name: This name will be viewable by staff and the public, so name it something that will be helpful to both.
Calendar URL: You can create a custom calendar name that will be part of its online booking link.
Meeting Duration: Designate how long you want meetings to be by default, you can always manually adjust them later if needed.
Meeting Location: Enter your online meeting link or a physical address as needed.
Walk through the additional prompts and settings as needed to customize your calendar as desired.
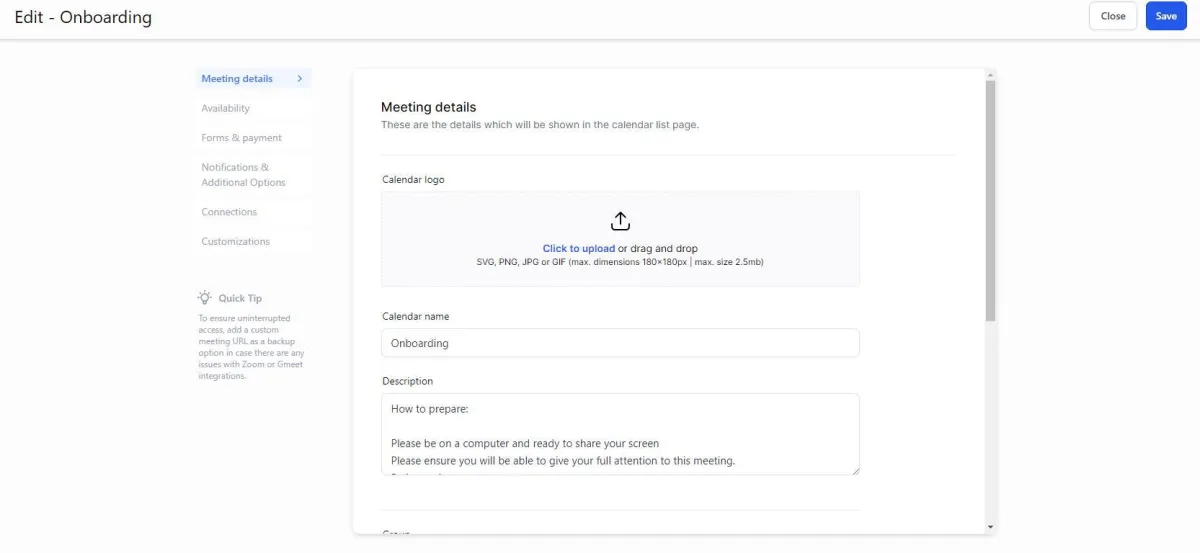
Edit Calendar
Click the 3 vertical dots to the right of the Calendar you wish to edit. Click on 'Edit'. A popup will appear with several options.
Meeting Details: Update logo, Calendar name, Meeting description, Custom URL (for online booking), Meeting location (online meeting link or physical address), and Event color (how it displays on your schedule).
Availability: Update availability for online booking open slots, set Meeting interval and duration, set Minimum scheduling notice, set Date range for how far out you want people to be able to book, set Maximum bookings per day and per time slot, set Buffer time between appointments.
Forms & Payment: Select a form to use for online booking (including payment form if needed), set Confirmation message or page to show after someone books an appointment, set Facebook pixel (optional) for tracking purposes, set if you want Appointments to be auto-confirmed or not.
Notifications: Set type of notifications and recipients.
Connections: If you have another Calendar you wish to sync with, you can set it up in Settings > Integrations and then designate the sync settings here with this Calendar. This allows one-way and two-way syncing between various Calendar systems so you can better utilize online booking.
Customizations: Additional settings to update as desired.
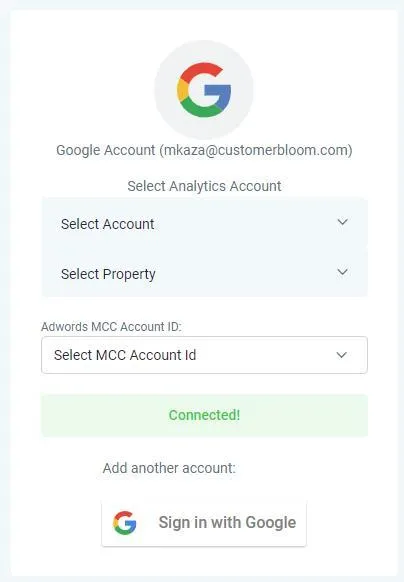
Sync Google Calendar
If you use a Google Calendar or are able to sync your calendar with a Google calendar, you can setup both one-way and two-way syncing for a more streamlined system for online booking.
How To Sync A Google Calendar:
In HighLevel, on the bottom left, click Settings
On the bottom left, click Integrations
Look for the G icon, click the 'Sign in with Google' button
Follow the prompts to connect your account
Once connected, on the left, click Calendars
Add or Edit the Calendar you wish to sync
If Adding a new Calendar, on the Integrations step, select the Google account you just synced and select one-way or two-way syncing
If Editing an existing Calendar, on the Integrations tab, select the Google account you just synced and select one-way or two-way syncing.
You can add and sync as many Google accounts as you wish, if you have multiple people or Google Calendars you wish to use with the system.
If you sync your Google account, you will also be able to connect Google Ads, Google Analytics, and Google My Business if they are all managed under the selected account

© 2024 MedspaBloom LLC - All Rights Reserved