
Automation
Learn All About the Automations
What Is It?
The HighLevel Automations feature is where you can view and manage most of the automated items within HighLevel including Workflows and Content AI.
The Automations section is where you will control how each piece of HighLevel interacts with each other and sends out notifications.
Watch the video to see an overview of the Automation feature and view details about the individual features in the Automations section by reading through the descriptions below.
Workflows
The Workflows section is where you will build all of the automated functionality of HighLevel. The Workflows system is fairly robust and does not require any programming knowledge to build automations.
Create Folder: To keep your Workflows organized, you can click on 'Create Folder' in the upper right (on desktop computers).
View: You an sort the Workflows by clicking on 'Recent' (clock icon) or List (bulleted icon).
Search: If you have a large number of Workflows, the Search functionality makes it easier to locate the one you need.
Filter: Use Filters to sift through multiple Workflows to locate the one you need.
The 'Create Workflow' option is covered in the next section in more detail.

Workflows > Create Workflow
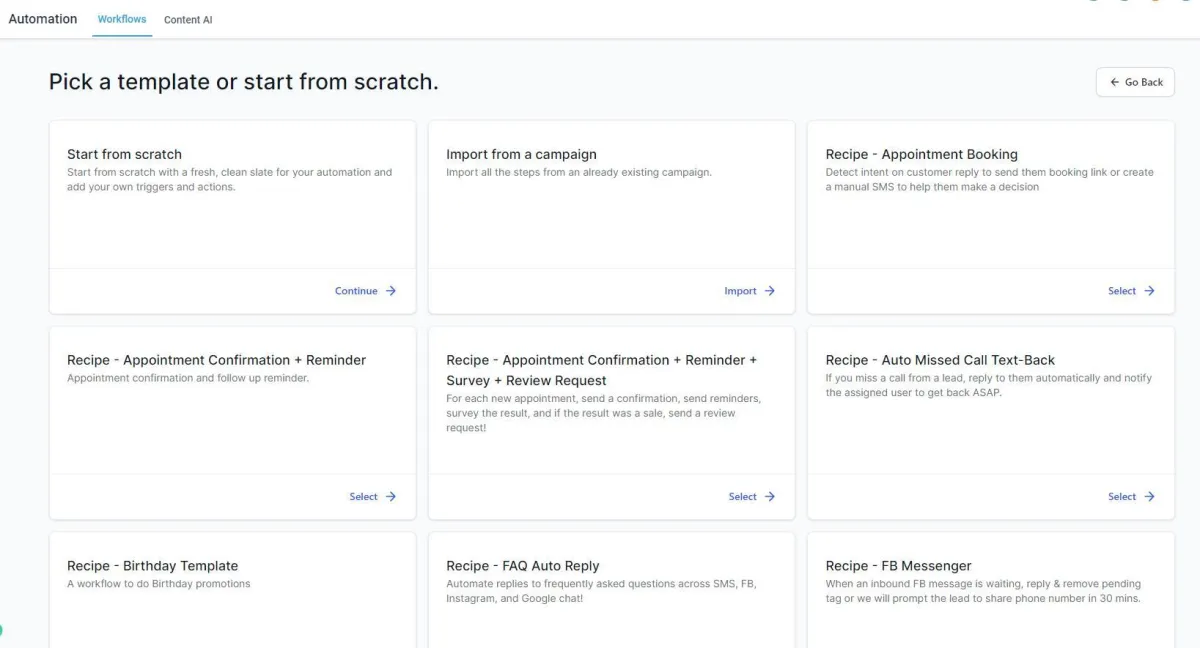
Pick A Template or Start From Scratch:
There are pre-built templates you can choose from for common Workflow automations. You can select one of the pre-built templates or opt to 'Start from Scratch'. For this demonstration, we will build from Scratch.
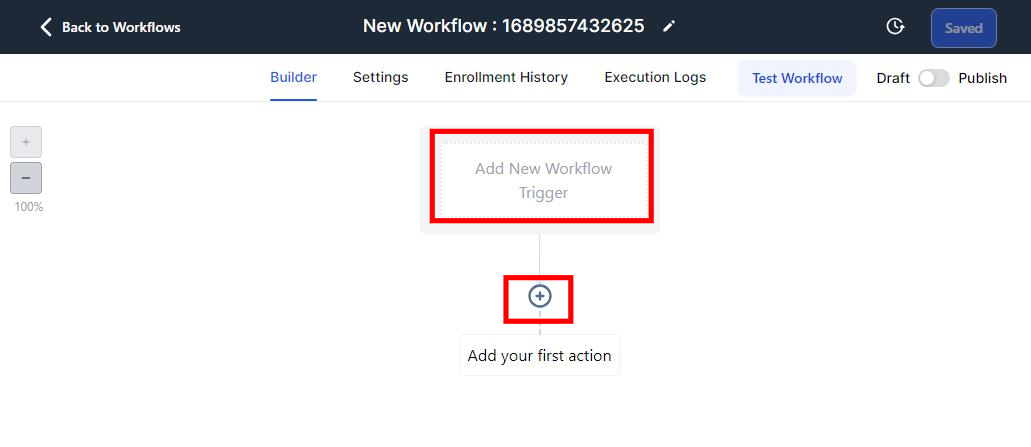
Add New Workflow Trigger:
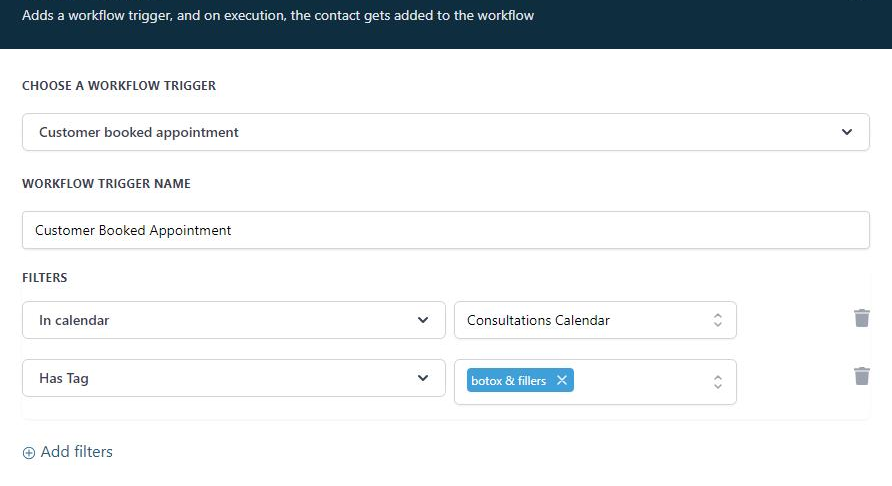
Every Workflow needs a Trigger - something that tells it to run. Click on the "Add New Workflow Trigger" text to set your Trigger. Scroll through the available options to familiarize yourself with what you can use as a Trigger. You can even refine the Trigger based on additional filtering and settings.
Add Your First Action:
Once your Trigger is set, you then need to tell the system what to do if/when that Trigger is activated. You can add as many actions as you like. Click the + icon to add your first (circle with + in center).
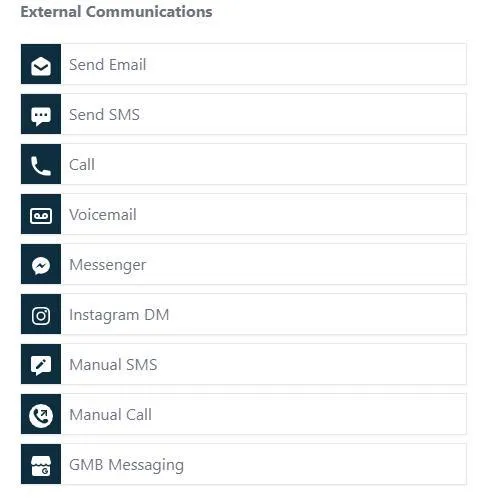
You can choose a variety of types of Actions including Internal (your staff), External (your Contacts), and more. Make sure you select the correct Internal vs External Action, you don't want to accidentally send Contacts your Internal messaging.
Once you select the appropriate Action, a side bar will appear that will let you update all of the settings for that particular Action. You can create as many Actions as you like and even use the same Action multiple times as needed. Once you are done updating the Action settings, make sure to click "Save Action" down in the bottom right corner (on desktop computers) to ensure you save all of your changes.
Click "Add Action" icon (circle +) as many times as needed to create additional actions for this specific Workflow.
Publish / Name / Save Your Workflow:
Once you are done building out your Workflow, you must toggle ON the Draft-Publish button to activate it.
Be sure to Name your Workflow intuitively so if others are viewing the Workflows they can easily understand what each one is for and what it does.
Once completely done updating the Workflow, be sure to click "Save" in the upper right corner to save all of your work.
Click "Back to Workflows" in the upper left corner (on desktop computers) to return to the main Automations / Workflows view.
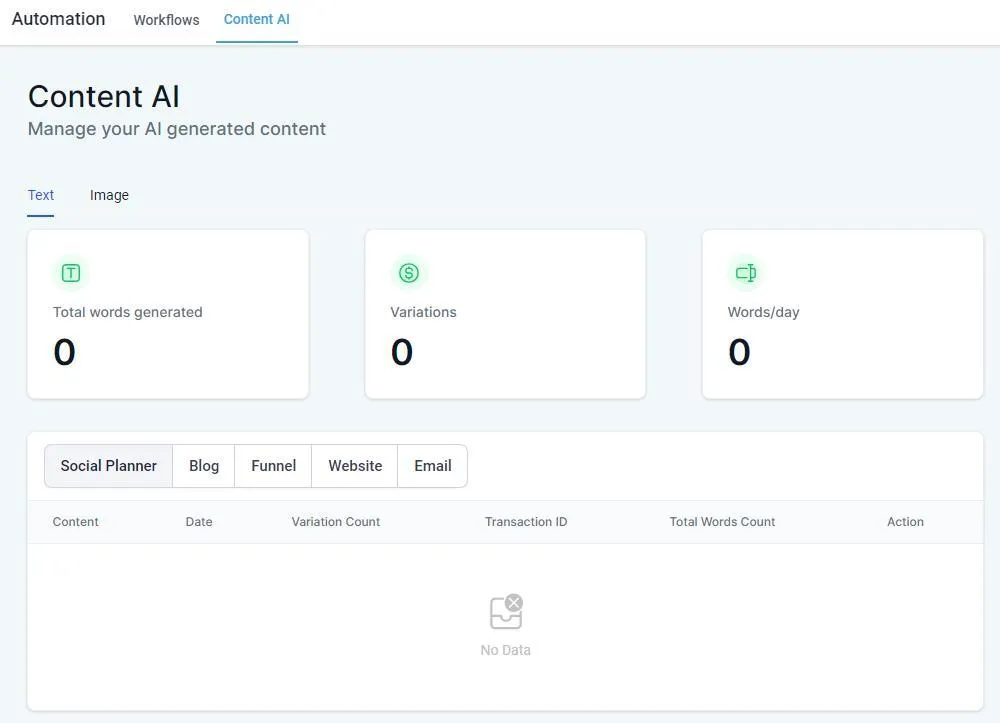
Content AI
If you utilize the Content AI feature throughout HighLevel, you can view reporting for it within the Automations section.

© 2024 MedspaBloom LLC - All Rights Reserved