
Calendars / Online Scheduling
Setup Calendar + Online Scheduling
Step 1
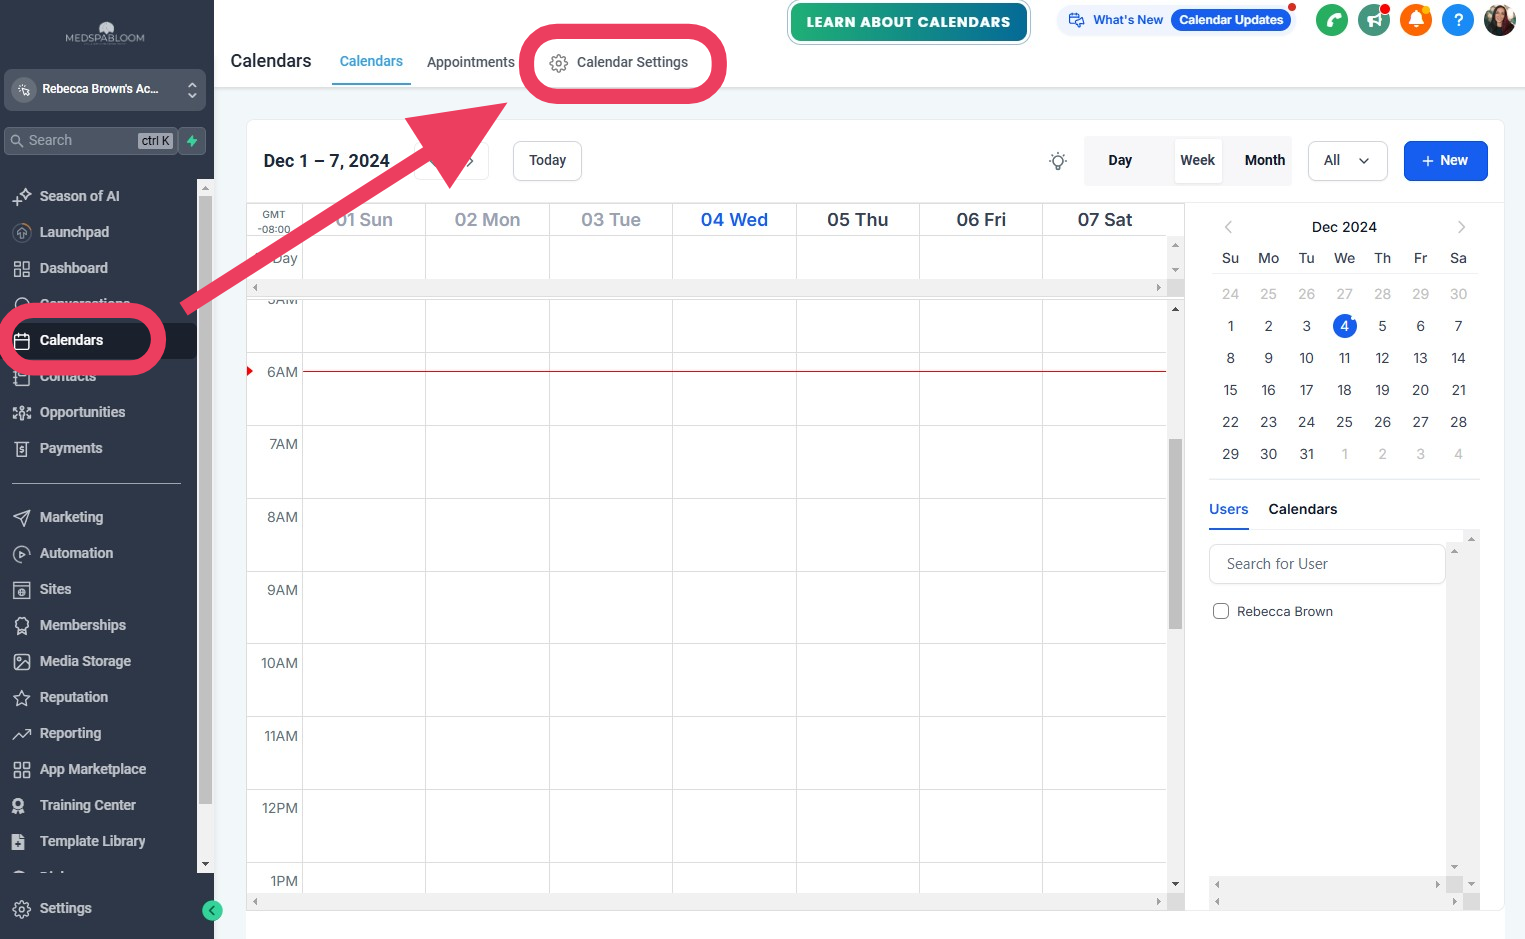
Go To Calendars Page
Starting at the Dashboard...
On left, click on "Calendars"
Top right, click on "Calendar Settings"
Go to next step below...
Step 2
Setup Your Calendar Settings
If you already have an online scheduling system you would like to use instead, go to Step 4 below.
If you would like to use the built-in calendar and scheduling system, follow these steps:
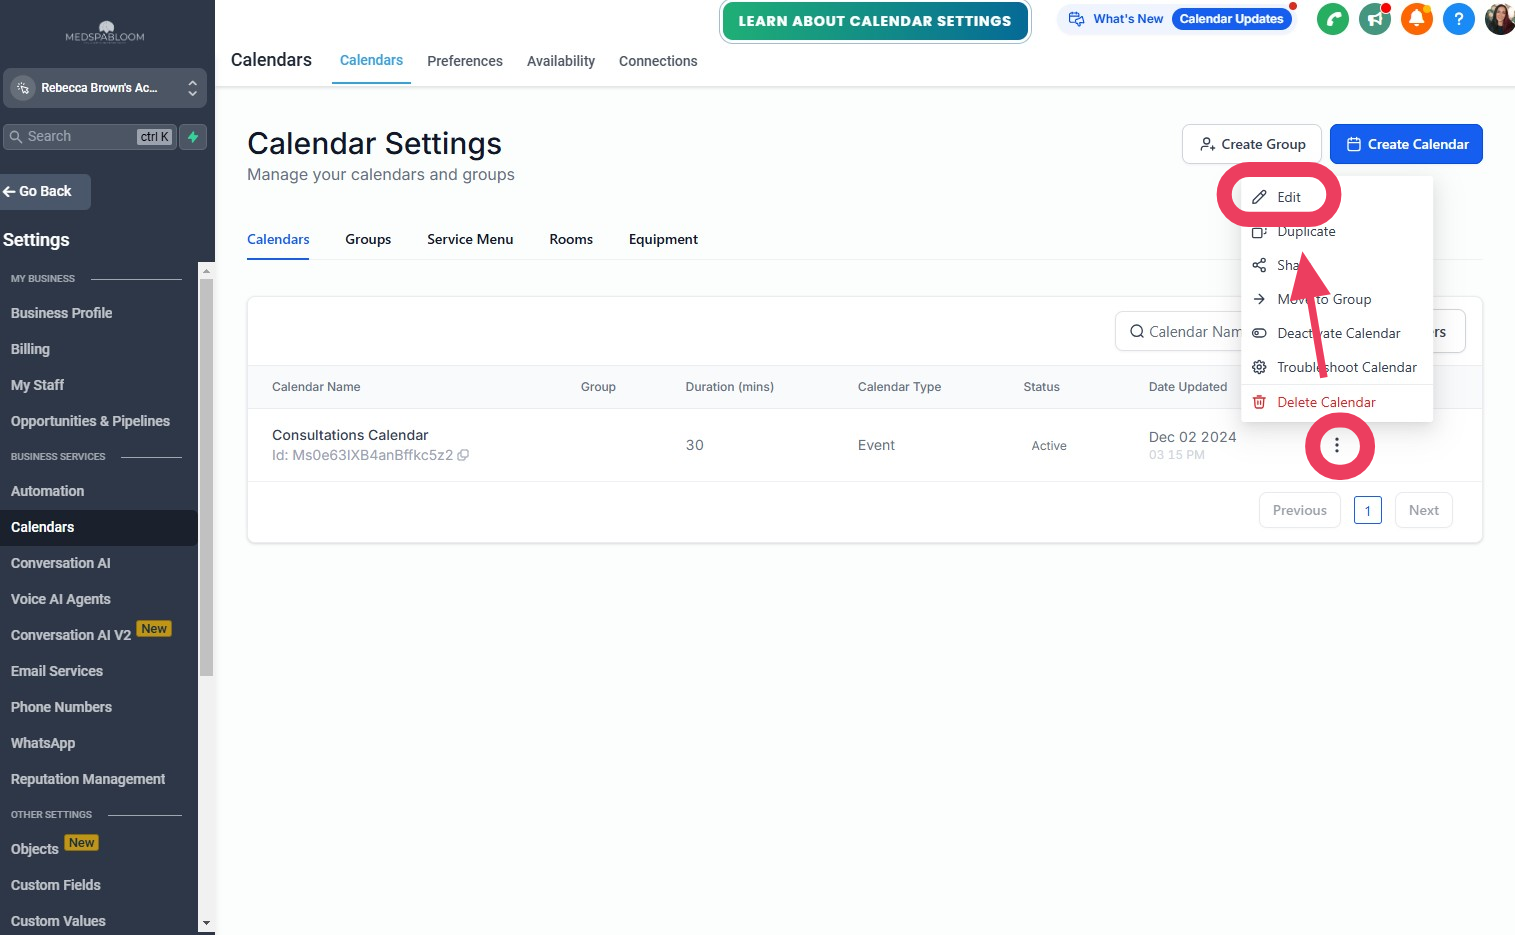
To the right of "Consultations Calendar", click on the 3 dots
Then click on "Edit"
Update the calendar settings to your liking
Click the "Save" button (upper right)
Then click the "Close" button (upper right)
Go to the next step...
Step 3
Get Your Calendar Link
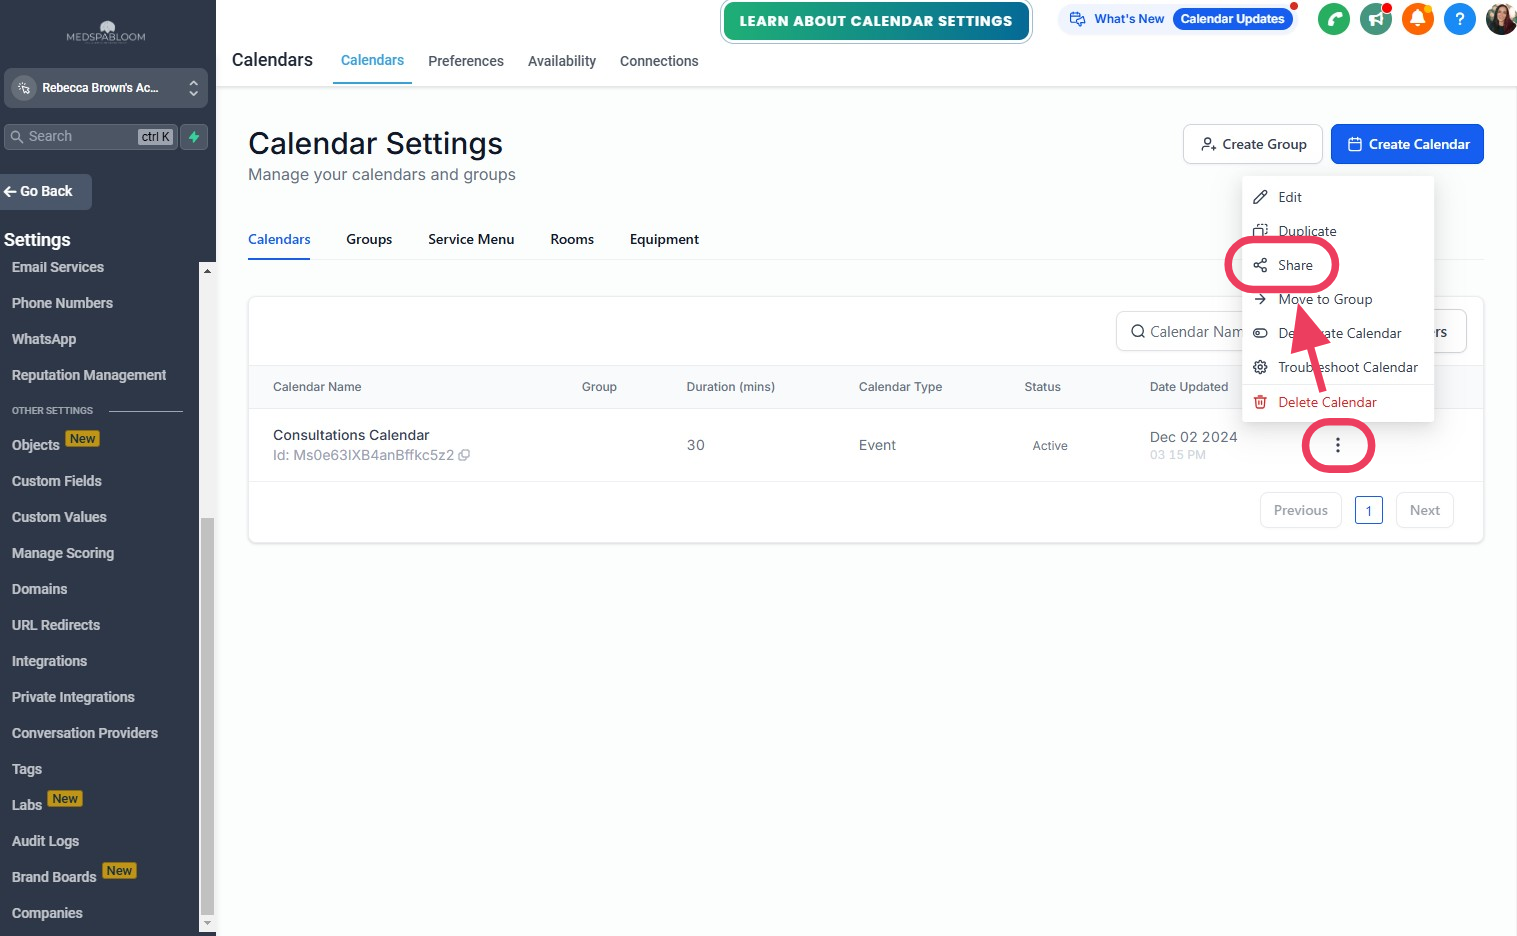
To the right of "Consultations Calendar", click on the 3 dots
Then click on "Share"
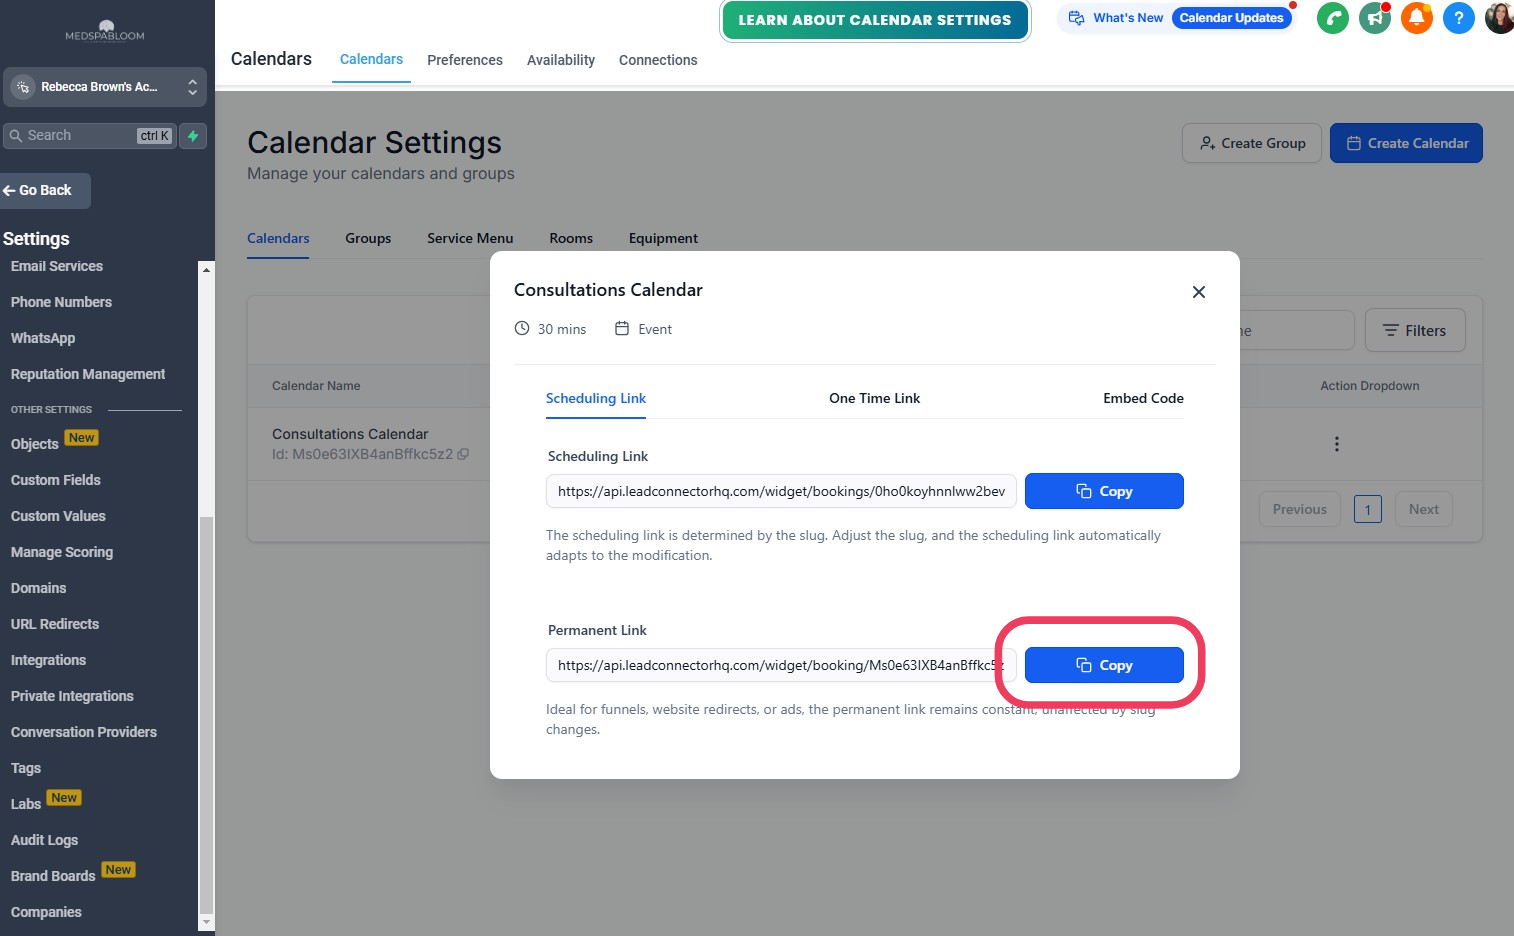
Next to "Permanent Link", click on the BLUE button for "Copy"
Click the "X" button to close
Go to the next step...
Step 4
Update Scheduling Link Custom Value
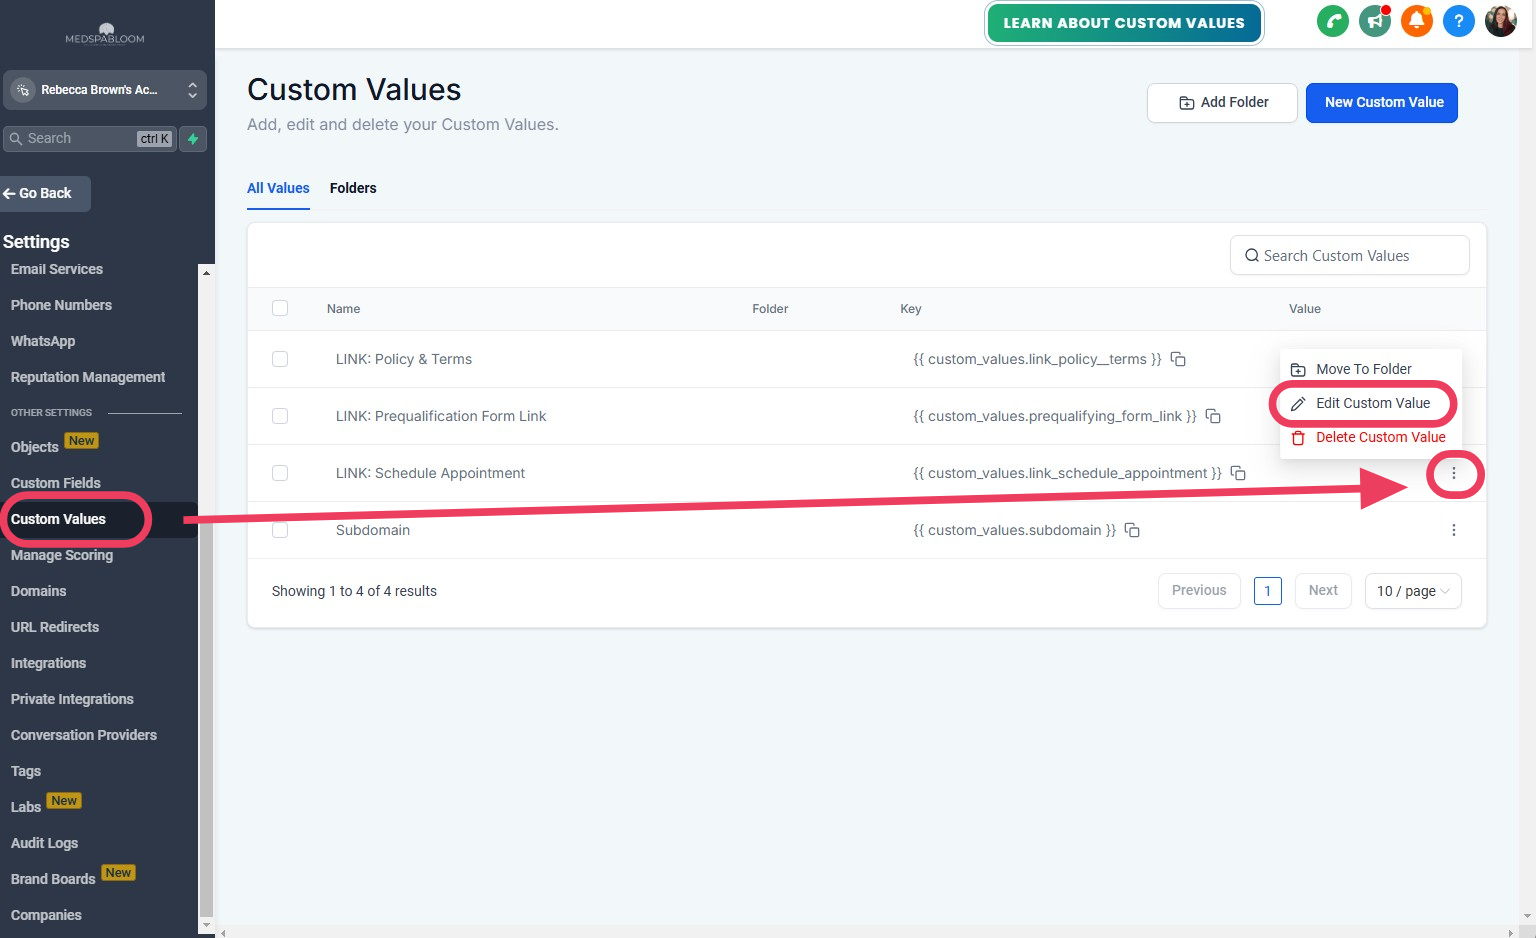
On the left, click on "Custom Values"
(you may need to scroll up/down on the dark blue area)
On the Custom Values screen...
Locate the "LINK: Schedule Appointment" item
To the right of it, click the 3 vertical dots
Click on "Edit Custom Value"
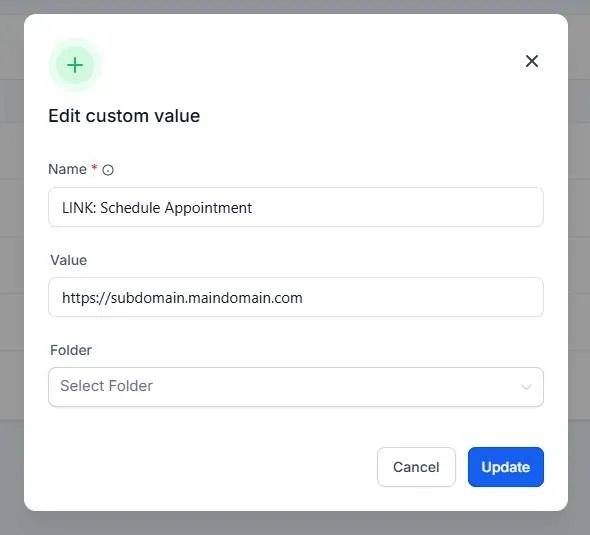
In the popup...
For "Value" paste your Calendar link
(from Step 3 above)
NOTE: If you are using a different scheduling system, copy your existing scheduling link and paste it into the "Value" field
Click the "Update" button